How to create Android Emulator in Android Studio using AVD Manager
In this Post we will learn What is Emulator and how to create Emulator in
Android Studio using AVD.
What is an Emulator?
The Android Emulator simulates Android devices on your computer so that
you can test your application on a variety of devices and Android API
levels without needing to have each physical device.
The emulator provides almost all of the capabilities of a real Android
device. You can simulate incoming phone calls and text messages, specify
the location of the device, simulate different network speeds, simulate
rotation and other hardware sensors, access the Google Play Store, and
much more.
Testing your app on the emulator is in some ways faster and easier than
doing so on a physical device. For example, you can transfer data faster
to the emulator than to a device connected over USB.
The emulator comes with predefined configurations for various Android
phone, tablet, Wear OS, and Android TV devices.
A typical Android Emulator looks like this:
What is AVD Manager?
AVD Manager is a tool to create and manage Android Virtual Devices(AVDs), which define device configuration for the Android Emulator.
Before you can actually run an emulator, you need to install
the Android SDK on your machine, and define
an AVD which defines the hardware characteristics of
the emulator. You can define things like the device RAM, whether
there is touch screen and/or keyboard, camera
support, audio playback support, etc. You can create
several AVDs to test your device on several virtual
devices.
An AVD contains a hardware profile, system image, storage area, skin, and
other properties.
Steps to create Android – Emulator Using AVD Manager
Prerequisites for
AVD Manager
1. Android Studio Should be installed
Steps:
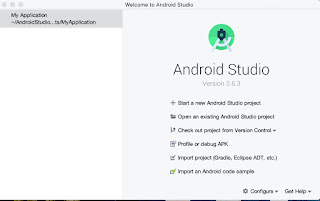
1. Open Android Studio
2. Click on configure button from bottom and click on “AVD Manager”
Or another way to open AVD manager is :
2. To open the AVD Manager, do one of the following:
a. Select Tools > AVD Manager.
b. Click AVD Manager in the
toolbar.
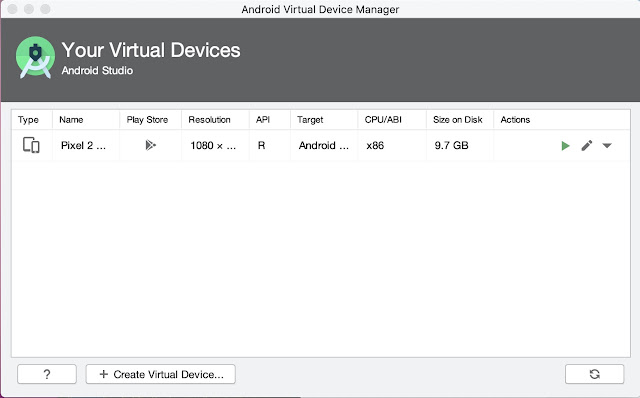
AVD manager looks like below
3. Click on “Create Virtual Device” button
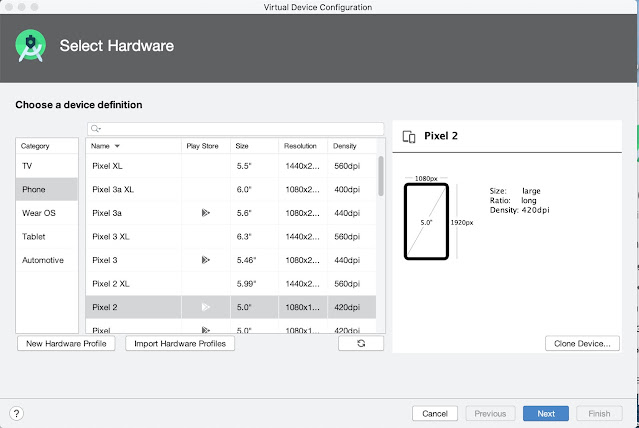
4. Select “Phone” from Category panel
In the main panel list of different devices name will be displayed.
Select any device which you want.
5. Click “Next” button
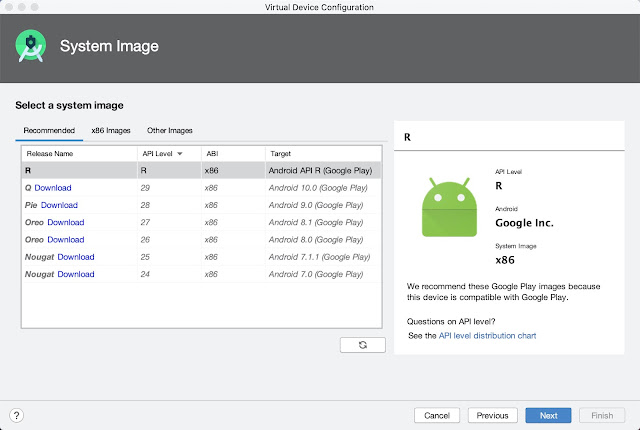
6. Select the system image for a particular API
level, and then click Next.
The Recommended tab lists recommended
system images. The other tabs include a more complete list. The right pane
describes the selected system image. x86 images run the fastest in the
emulator.
If you see Download next to the system image, you need
to click it to download the system image. You must be connected to the
internet to download it.
7. After downloaded, Click “Next” button
8. In AVD page, Enter name and select configuration like device
orientation , graphics etc..

9. Then click on “Finish” button
Once your device created, it will be listed like below in AVD manager
10. Then Click on Launch(>) button which is located in Actions
column
So post launch , device will get unlock itself. Need to wait few minutes
get device ready for use.
Once it is ready it looks like below
How to check the name of the emulator which is created to add to your appium script ?
Use below command and check the name
adb devices
Edit existing AVDs
From the Your Virtual Devices page, you can perform the
following operations on an existing AVD:
-
To edit an AVD, click Edit this AVD and make your changes.
-
To delete an AVD, right-click an AVD and select Delete. Or click Menu and select Delete.
- To show the associated AVD .ini and .img files on disk, right-click an AVD and select Show on Disk. Or click Menu and select Show on Disk.
- To view AVD configuration details that you can include in any bug reports to the Android Studio team, right-click an AVD and select View Details. Or click Menu and select View Details.


No comments:
Post a Comment
If any suggestions or issue, please provide